First off, we went over terms like Motion Graphics and Compositing, what After Effects is, and what it can do.
Motion Graphics: "Bringing together multiple elements and animating them along a timeline." or "Bringing together multiple elements and sequencing them into a cohesive series of events."
Compositing: "Bring multiple elements together in a single shot." or "Bringing together several elements and making them look like they were shot in the same location."
Compositing creates the single (individual) pieces of your production, while Motion Graphics puts them together into a single piece (movie, animation, etc.).
Determining the definition of a project was in the next lesson. One thing, he said, that seemed really important was that the images and elements that are imported into After Effects are only links. Therefore, moving, renaming, or deleting files outside of After Effects (even if they are saved in an After Effects file) will break their connections and will cause lots of trouble (example: having to reload all of those changed files back into After Effects). If you need to reload a certain file, right click on the image in your project's main folder and click "Replace Footage/File/select a file/press ok".
In the following tutorial we went over how to create a new composition and some of the settings you could change. Here are some pictures explaining a few things.
Creating a New Composition
Adding More Elements into New Composition
Changing Composition Settings
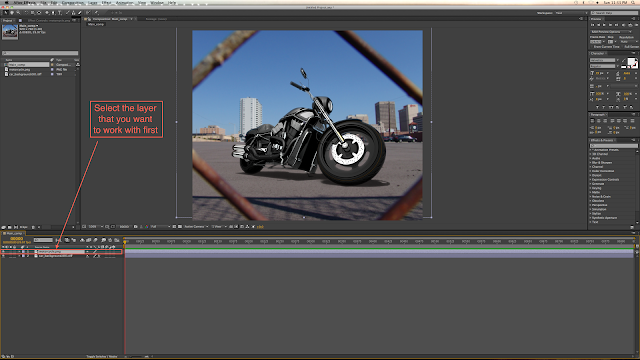
There are various kinds of layers that store information inside of a composition. Examples of this would include image and text layers. Dragging a project file into the timeline will also create it's own layer.
After Effects, just like many other Adobe products, reads layer information from top to bottom. This could potentially effect the visibility of some of the elements in your layers. So if you are having trouble seeing an image or text then a simple fix might just be rearranging the layer order.
"An Alpha defines the transparency [allowing light to be transmitted through a material] or opaqueness [not reflecting light] of a pixel or individual part of an image."
Images showing white mean that they are opaque or have no transparency, while anything showing black means that it is 100% transparent.
Images showing white mean that they are opaque or have no transparency, while anything showing black means that it is 100% transparent.
To See an Alpha Channel
Example of Layer with Alpha Turned On
Reloading a File's Alpha Info
Solution to Reloading an Alpha
The next tutorial went briefly over where you can find effects to manipulate your images/movies in various ways. We experimented a bit using some of the blur effects and color correction, but there are many many other effects. Here is a screenshot showing you an example of what I mean.
After that we moved on to talking about masks and some of their uses. You can use masks for various different purposes, but here are some images showing a few basic uses. Make sure that you have your layer selected before trying to mask an object in your scene out.
Using the Pen Tool to Mask Out Objects
Difference in Add and Subtract Option
Using the Feather Tool
Using the Shapes Tool to Mask Out Objects
Result of Masking Out Objects
In the next tutorial we went over how to change the position, rotate, scale, and opacity parameters. Here are some screenshots discussing some of the main points.
Adjusting Pixel Resolution
Positioning, Rotating, Scaling, and Changing the Opacity of Your Objects
In the next lesson we briefly went over how to work with keyframes to create animations. Something important to remember. To get your animations working properly you have to set an initial keyframe (at the beginning of your animation), move to a new section in your timeline and then make a change (changing position, rotation, scale, etc.) to set another keyframe. After Effects calculates between the frames, where you made the changes, to produce your animation. Here are some screenshots illustrating some things.
Setting Keyframes for an Animation
Setting Multiple Keyframes Requirement
To play our animation back in real time press the zero key on our keypad. This starts a "RAM Preview" which should accurately show how your animation's speed will look like when you render it. Or you can go into the Composition menu above, go into preview, and click on RAM Preview.
RAM Preview
Lastly, we went over how to set up the Render Queue so that we can turn our animation into a movie file. There are many different ways that you can tweak the settings so that they will fulfill any requirements that are demanded of you. Here are a couple screenshots showing examples of this.
Bringing Up the Render Queue
Another Way to Bring Up the Render Queue
Render Queue Settings
(After you have finished rendering the tiff files you can always import the tiff sequence back into After Effects and then render them all as a movie file like QuickTime or an AVI.)
A Closer Look at the Output Module Settings
A Closer Look at the Output To Settings
Well that finishes that tutorial. After going through After Effects with an experienced instructor it has made the program not look as scary as it used to. It is hard to look at a program with a million buttons and have no clue what any of them do, but if you continue to learn a little bit at a time it's not half as bad. I hope that this blog has served as a help to any, like myself, who felt pretty lost initially with the program known as After Effects. See you all later!
.png)
.png)
.png)
.png)
.png)
.png)
.png)
.png)
.png)
.png)

.png)
.png)
.png)
.png)
.png)
.png)
.png)
.png)
.png)
.png)
.png)
.png)
.png)
.png)
.png)
No comments:
Post a Comment